
Here are the written instructions to help you custom make a raglan sweater. Keep in mind you can also adapt any pattern for a bottom-up raglan sweater using this method, including the sweater that comes with our little Magnus mouse and which is available in our webshop.
And make sure to check out this week’s video here:
Please accept YouTube cookies to play videos on arnecarlos.com
By accepting you will be accessing content from YouTube, a service provided by an external third party.
If you accept this notice, your choice will be saved and the page will refresh.
METHOD:
- Measure the width around the chest (in case you are doing Magnus’ the mouse sweater, measure around the belly, which is the widest point on thr body) to decide the width of the sweater.
- Check the tension of the yarn you will use for the sweater and cast on stitches based on that.
- Add stitches to get a number divisible with 4 to make a rib k2, p2. Make a rib that looks proportionally good.
- When the ribbing is finished, change to a larger needle (we use usually 3.0 for ribbing and 3.5 mm needles for stockinetter with DK yarn) and increase at the same time 2 stitches, one in the front and one in the back. Place one stitch marker in the sides and make sure you got the same number of stitches for the front and the back.
- The 2 increased stitches are now the centre front and the centre back of the body.
- If you have a colourwork design on your sweater, make sure you balance the pattern in front and in back, if the pattern doesn´t work around the body, have the break in the pattern in the sides.
- Knit up to the arms, bind off some stitches in the sides and place the remaining stitches on two dpns, one for the front and one for the back.
- For the sleeves, cast on half of the number of stitches you used on the body on the smaller dpns. Knit the rib, the same length as the body.
- When the rib is finished, change to the larger needle and increase at the same time 1 stitch, and copy half of the body.
- When the sleeves have the same length as the body, bind off the same number of stitches as you did on the body, half of the stitches at the beginning of the round and half of the stitches at the end of the round.
- Knit the second sleeve the same way.
- You should now have the same number of stitches on all of the four needles.
- Knit the body and the sleeves together and decrease on every second round.
- On the decrease rounds start every dpn with k1, sl1, k1, psso and end dpn with k2 tog, k1.
- Check the neck opening with the body of the mouse, you should be able to put the sweater on Magnus with feet first down the turtle neck.
- When the opening is good, change to smaller dpns and knit a long rib, k2, p2. The rib has to be long enough to be folded.
- Weave in loose ends and steam the sweater if necessary. Do not steam the ribbing.
Here is a good sketch to give you a good overview of what you are doing:
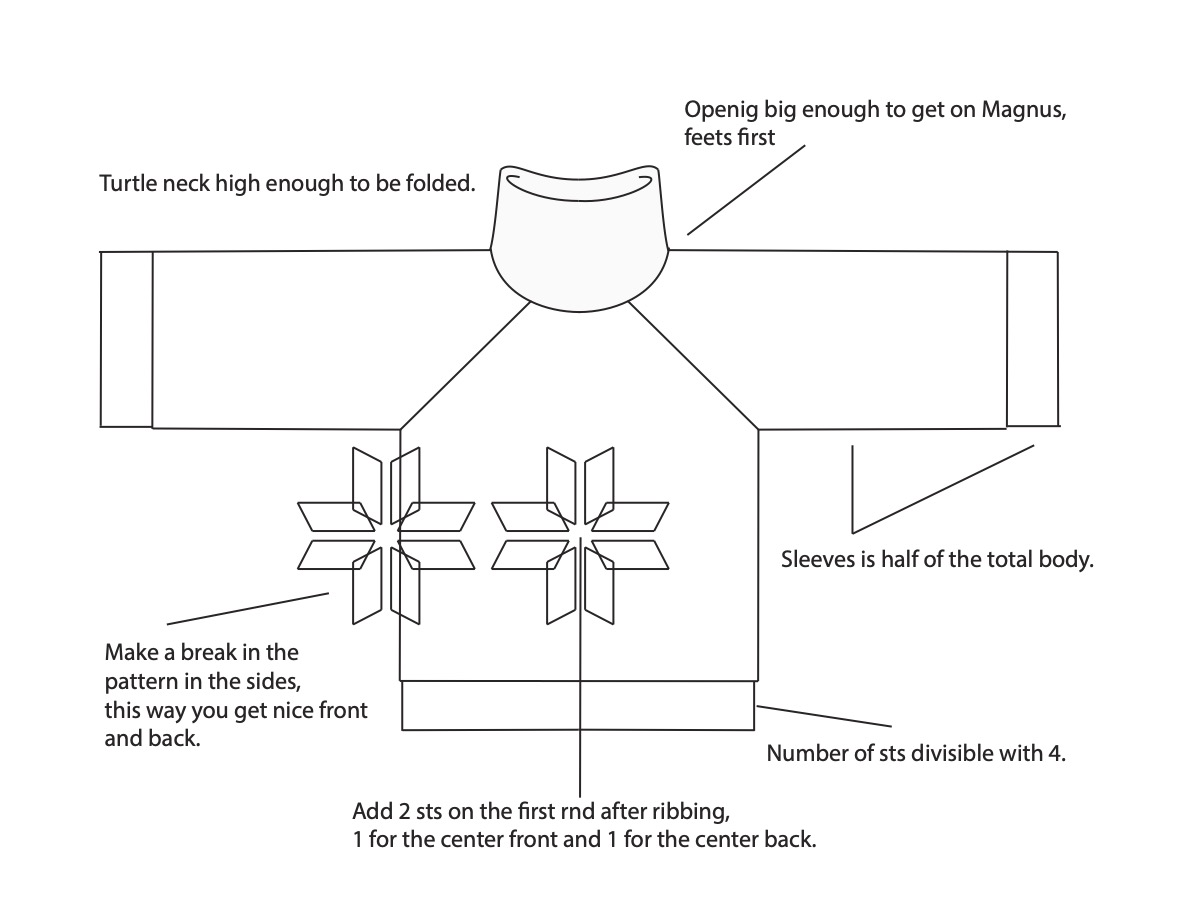
Click to enlarge